
 Black Steel Doors
 Woodstock Campers
 Phillips Joinery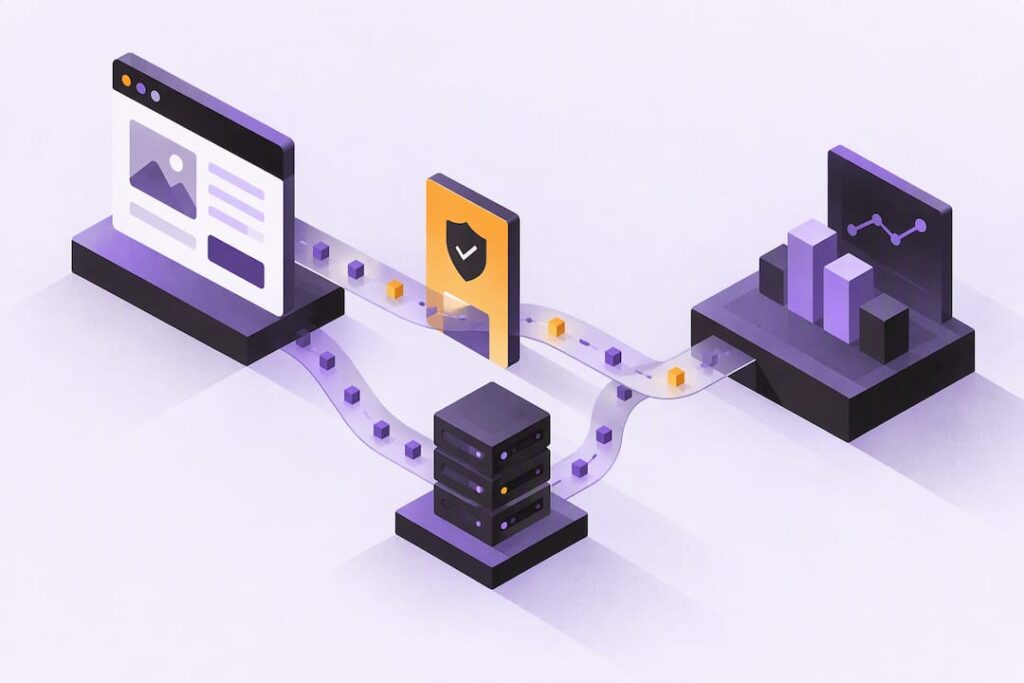
Create your pixel in Meta Events Manager and add the base code, or use a supported partner integration if your platform offers one. Add Conversions API alongside it for more reliable measurement, and only fire any advertising tag after you have valid user consent. That order, pixel first, Conversions API second, consent checked throughout, gives you the most dependable setup with the least rework later.
TL;DR:
- Browser limitations, ad blockers, and consent choices significantly reduce pixel reporting accuracy, making server-side Conversions API essential for reliable measurement.
- Proper pixel setup involves creating it in Meta Events Manager, avoiding duplicates, and choosing the best connection method, with partner integrations being the fastest for supported platforms.
- Implementing standard events in a specific order—PageView, ViewContent, AddToCart, InitiateCheckout, then Purchase—ensures data consistency and better ad campaign performance.
- Confirm pixel and event functionality using tools like Meta Pixel Helper, Events Manager’s Test Events, and network request checks to avoid common errors like duplicate events or missing parameters.
- Prioritize reliable event firing and consent management first, then consider advanced tracking like Conversions API, to ensure accurate, compliant, and actionable advertising data.
Table of Contents
- What the Meta Pixel actually does
- Step-by-step: create your pixel in Events Manager
- Choosing how to connect your pixel to your website
- Setting up standard and custom events
- Why you also need Conversions API
- Consent, privacy and what UK guidance actually requires
- Verify and troubleshoot your pixel setup
- Implementation checklist and when it’s worth bringing in help
- Our take: reliability matters more than coverage
- How we can help with pixel and Conversions API setup
- FAQ
- Sources
What the Meta Pixel actually does
The Meta Pixel is a small piece of code that runs in a visitor’s browser and sends event data back to Meta: a page view, an add to cart, a completed purchase. Meta uses that stream to build advertising audiences, measure which ads lead to results, and optimise delivery towards people likely to take the action you care about. Without it, your Meta Ads campaigns are flying with no instruments, you can set a budget and a creative but you can’t tell Meta what success actually looks like.
Each event you send maps to something useful on the advertising side. A Purchase event with a value lets Meta optimise for return on ad spend rather than just clicks. A ViewContent event lets you build a retargeting audience of people who looked but didn’t buy. This is where remarketing strategies that convert start: the pixel’s audience data is the raw material, the segmentation and messaging come after.
The catch is that this is a browser-side mechanism, and browsers have become less cooperative with it. Several factors reduce what a pixel alone can see:
- Ad blockers and tracking-prevention browser features can stop the pixel script from loading or sending data at all.
- Visitors who decline advertising cookies through a consent banner correctly produce no pixel events, by design.
- Safari’s Intelligent Tracking Prevention and similar browser policies limit cookie lifetime, which affects attribution windows.
- Ad blockers aside, slow or failed script loads simply mean the event never fires.
None of this makes the pixel useless, it’s still the foundation of Meta advertising measurement. But it does mean that a client-side-only setup will under-report conversions, sometimes significantly, which is the main reason server-side measurement has become part of a standard setup rather than an advanced extra.
Step-by-step: create your pixel in Events Manager
Everything starts in Meta Events Manager, the hub where you create pixels, check their health, and connect data sources. The process itself is quick, the decisions you make along the way are what matter.
- Open Events Manager from your Meta Business Suite or Ads Manager account and select “Connect data sources,” then choose “Web.”
- Select “Meta Pixel” as the connection method and click through to start the creation flow.
- Give your pixel a clear, specific name, ideally tied to the business or website it serves rather than a generic label like “Main Pixel,” especially if you manage more than one account.
- Enter your website URL when prompted. Meta will use this to check for a partner integration (more on that below).
- Confirm which Meta Business Account the pixel belongs to. If you manage client accounts, double-check you’re creating the pixel under the correct business, not your own personal one, since moving a pixel afterwards is a hassle.
- Review the data-sharing settings before finishing. These control how much event detail is shared with Meta and are worth revisiting once your Conversions API setup is live.
A common mistake at this stage is creating a second pixel because someone can’t find the first one. Before creating a new pixel, check Events Manager thoroughly, a business can technically have multiple pixels, but running two on the same site splits your data and confuses optimisation. If you’re auditing a client’s account as part of a website optimisation checklist, checking for duplicate or abandoned pixels should be one of the first things you do.
Once the pixel exists, Meta will prompt you to choose how to connect it to your website. This is the point where your platform and your team’s technical comfort should drive the decision, which we’ll cover next.
Choosing how to connect your pixel to your website
Meta offers several broad routes to get the pixel firing on your site, and the right one depends on your platform, your team, and how often you expect to change tracking in future.
Partner integrations are the fastest option when your platform supports one. Shopify, WooCommerce, Wix and several other major platforms have built-in Meta integrations that handle the base code and, in many cases, basic event mapping automatically. If you’re on one of these platforms, start here rather than reaching for manual code, it’s less to maintain and less likely to break on an update.
Google Tag Manager (GTM) is the better route for anything custom-built, or for teams that expect to add, change or remove tracking tags regularly. Rather than editing site code every time marketing wants a new event, you manage everything through GTM’s interface. The trade-off is a short learning curve, you need to understand triggers and variables, but once it’s set up, adding a new conversion event takes minutes rather than a developer ticket.
Manual code installation means pasting the base pixel code, available from Meta for Developers, directly into your site’s header, ideally just before the closing </head> tag, so it loads on every page. The most frequent pitfall here is installing it in a template that doesn’t apply site-wide, so half your pages carry tracking and half don’t. The second most frequent pitfall is leaving the test event code in from debugging and never noticing it’s still firing.
Server-side setup via Conversions API doesn’t replace the browser pixel, it works alongside it. Plan for this when you have a developer available or a CRM/backend system that can send events directly to Meta’s servers, bypassing the browser entirely for events like completed purchases. We’ll go into its mechanics in the next section, but the decision to support it belongs here, at the point you’re mapping out your overall approach.
- Partner integration: minimal setup, limited customisation, best for standard e-commerce platforms.
- Google Tag Manager: moderate setup effort, high flexibility, best for marketing teams managing their own tags.
- Manual code: full control, higher risk of placement errors, best when you have direct access to site templates.
- Conversions API: requires development resource, most resilient to browser restrictions, best as a complement rather than a replacement.
Pro Tip: If you’re not sure which method your platform supports, search “Meta Pixel” plus your platform name in Events Manager’s setup flow, it checks for a partner integration automatically before offering the manual options.
Setting up standard and custom events
Once the base pixel is installed, it only tells you that someone visited a page. The real value comes from the events layered on top, and the order you implement them in matters more than people usually expect.
- Start with
PageView, which is included automatically with the base code, then addViewContenton product or service pages, so you can see what people are actually looking at. - Add
AddToCarton the relevant button or action, this is usually the first meaningful signal of purchase intent and feeds retargeting audiences directly. - Add
InitiateCheckoutat the start of your checkout flow, useful for spotting drop-off between browsing and buying. - Add
Purchaselast, on your order confirmation page, and make sure it passes avalueandcurrencyparameter every time, this is the event Meta’s optimisation leans on most heavily for return-on-ad-spend campaigns. - Decide between standard events and custom conversions only once the standard set is working. Meta provides a fixed list of standard events (
Lead,CompleteRegistration,Subscribeand others) that come with built-in reporting and optimisation support. A custom event is anything you define yourself, useful for tracking something specific to your business that doesn’t map neatly to a standard option, but it won’t get the same level of automatic optimisation support in Ads Manager. - Keep parameters consistent across every event. If you’re passing a
content_id, use the same ID format your product catalogue uses. If you’re passingvalue, always use the same currency and always as a plain number, not a formatted string. Inconsistent parameters are one of the most common reasons reporting looks wrong even when events are technically firing. - Test every event before trusting it, using Meta Pixel Helper and Events Manager’s Test Events tab, covered in detail in the verification section below.
A sensible build order is PageView, then ViewContent, then AddToCart, then InitiateCheckout, then Purchase, checking each one fires correctly before moving to the next rather than installing all five at once and debugging a tangle of five problems simultaneously. It’s slower up front and considerably faster overall.
Where this ties back to measurement quality: an A/B testing programme is only as trustworthy as the events feeding it. If Purchase is under-firing or passing inconsistent values, your test results will look noisier than they actually are, and you’ll end up chasing statistical ghosts.
Why you also need Conversions API
Conversions API, or CAPI, sends event data from your server directly to Meta rather than relying solely on the browser. It doesn’t replace the pixel, it runs in parallel, filling in the gaps where browser restrictions, ad blockers or consent choices stop the client-side pixel from sending an event. Guidance and industry practice increasingly treat pairing a client-side pixel with server-side event sending as standard practice for exactly this reason, a combined setup reduces data loss from browser controls and ad blockers and tends to improve attribution for optimisation.
There are a few common ways to connect CAPI, depending on your technical setup:
- Partner integration: several e-commerce and CRM platforms offer built-in CAPI support alongside their pixel integration, the simplest route if your platform is one of them.
- Server container, for example via Google Tag Manager’s server-side container, which gives you a middle layer to manage events before they reach Meta.
- Direct backend SDK: Meta publishes SDKs for several common server languages, letting your development team send events straight from your application or checkout logic.
- CRM integration: useful for lead-based businesses where the conversion (a signed contract, a qualified call) happens outside the website entirely, days or weeks after the original ad click.
The part that trips people up most is deduplication. If both your browser pixel and your server-side CAPI send the same Purchase event, Meta needs a way to recognise they’re the same event, not two separate sales. That’s what the event_id parameter is for: you generate a matching ID for the same event on both the client and server side, and Meta uses it to collapse the pair into a single counted conversion. Skip this step and your reported sales volume will be inflated, sometimes dramatically, which tends to be discovered only when someone questions why Meta’s numbers don’t match the order management system.
On the security side, send only what you need. CAPI can carry hashed customer information (email, phone number) to improve match quality, but that’s a data-minimisation decision, not a “send everything and see” one. Hash personal identifiers before transmission, restrict access to your access tokens, and avoid passing fields your advertising use case doesn’t actually need.
Consent, privacy and what UK guidance actually requires
Before any of this fires, there’s a legal step that sits above the technical one: consent. The ICO’s guidance on storage and access technologies describes tracking pixels as code that creates communication between a browser and a server and identifies activity such as page views, and it’s explicit that storage and access technologies used for online advertising require consent under PECR. A pixel sitting on your site collecting advertising data without that consent in place isn’t a grey area. It’s a compliance gap.
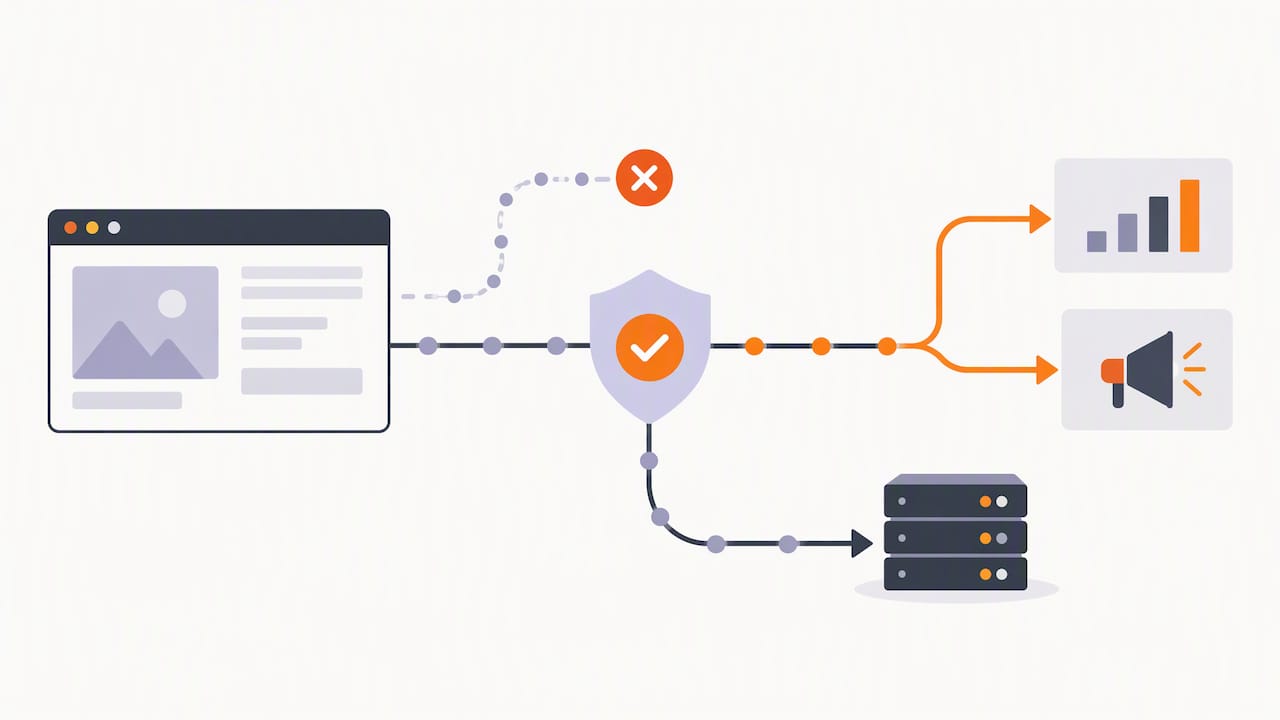
A pixel used for advertising is a storage and access technology by all sensible readings of that ICO guidance, the same rule that applies to cookies applies here because the mechanism and purpose are the same.
In 2025, the ICO issued a statement on changes to Meta’s advertising model, noting that advertisers must still obtain meaningful, specific consent for personalised advertising regardless of platform-level defaults. The point worth sitting with: platform changes don’t settle your own obligations, consent design on your own site is still yours to get right.
In practice, this means:
- Design your consent banner with personalised advertising as its own distinct category, not bundled under a single “accept cookies” toggle alongside analytics or functional storage.
- Make refusal and withdrawal genuinely easy, a visible way to change preferences later, not just an initial accept/reject screen that’s never revisited.
- Expect your event volume to drop once consent is correctly separated and enforced, that’s not a bug in your setup, it’s the system working, and it’s part of why Conversions API and good consent design go hand in hand rather than being separate projects.
- Keep records of what consent banner version was live when, which matters if you ever need to demonstrate what a visitor actually agreed to.
If your business is considering a consent-or-pay model, where visitors choose between accepting tracking or paying for an ad-free experience, a data protection impact assessment is worth doing before launch rather than after a query arrives, the ICO’s guidance on this area sets out what good design looks like.
Verify and troubleshoot your pixel setup
Installing the code is the easy part, confirming it actually works is where most of the real debugging time goes. Three tools do most of the job between them.
- Install Meta Pixel Helper, the official browser extension, and visit your key pages. It shows which pixels fire, which events they send, and flags obvious errors like a missing
currencyparameter on aPurchaseevent. - Use the Test Events tab in Events Manager to watch events arrive in near real time as you click through your own site, this is particularly useful for catching events that fire twice or not at all.
- Check your browser’s network tab for requests to
facebook.com/tr, this is the lowest-level check and will tell you if a request is being blocked before it even leaves the browser, which Pixel Helper alone won’t always catch. - Cross-check CAPI and browser events for duplicates using the
event_idfield in Events Manager’s event details, if you see the same conversion counted twice, deduplication isn’t matching correctly between the two sources. - Document the exact error before handing anything to a developer: which page, which event, what Pixel Helper or the network tab showed, and whether the issue is consistent or intermittent. Vague bug reports cost everyone time.
The most common faults are duplicate events from a pixel installed twice (often one manual, one via a plugin that nobody remembered was there), missing parameters that make reporting look broken even though the event technically fired, and third-party request blocking from browser privacy settings or ad blockers that no pixel fix will solve, only CAPI gets around that one.
Pro Tip: When an event looks like it’s “missing” in Ads Manager reporting, check Events Manager’s raw event log first, the event has often fired correctly but simply hasn’t attributed to the right campaign due to an attribution window or consent timing issue.
Implementation checklist and when it’s worth bringing in help
A reliable pixel and CAPI setup tends to follow the same rough shape regardless of business size: discovery (what events actually matter to this business), build (pixel, events, CAPI), QA (the verification steps above), then a short period of monitoring before anyone trusts the reporting fully.
- Start with a short discovery phase: list the three or four events that genuinely map to revenue or leads, resist the urge to track everything.
- Build the pixel and CAPI together where possible, bolting CAPI on months later usually means redoing deduplication work you could have planned in from the start.
- Budget realistic time for QA, a handful of hours checking events properly saves far more time than it costs, compared with discovering a broken
Purchaseevent three weeks into a campaign. - Factor in the full cost picture: the pixel itself carries no fee, but a working setup usually involves developer time, a consent management platform, and ongoing monitoring, agency delivery is one option if that combination is more than an internal team can absorb.
- DIY makes sense when you’re on a platform with a solid partner integration and your event needs are standard, e-commerce basics, lead forms, that sort of thing.
- Bringing in a developer or an agency makes more sense once you need custom events, server-side architecture, or a CRM integration, that’s where in-house time can disappear fast without the right experience behind it.
The pattern that separates a setup that holds up from one that needs redoing in six months is rarely the code itself, it’s whether consent, events and CAPI were planned together from day one rather than bolted on in sequence as problems surfaced.
Our take: reliability matters more than coverage
Most Meta Pixel advice focuses on getting more events firing, more custom conversions, more granular tracking. We think that’s the wrong priority order. A pixel with a small number of events that fire correctly, consistently, beats a pixel with many events where several are duplicated or missing data. Reporting you can trust is worth more than reporting that looks comprehensive.
The second thing conventional advice underplays is consent. It’s often treated as a legal afterthought bolted on after the “real” technical work is done. We’d argue it’s the opposite: consent design determines what data you’re even allowed to collect, so it should shape your event strategy from the start, not get retrofitted once marketing notices the numbers look thin.
If you take one thing from this guide, let it be this: get the base pixel and three or four key events working perfectly before you touch Conversions API, custom audiences or anything more advanced. Reliability first, sophistication second.
— Amir
How we can help with pixel and Conversions API setup
Getting a pixel and Conversions API working reliably, with consent handled properly from the start, takes a mix of skills that doesn’t always sit neatly within one in-house team: development, advertising strategy, and a working grasp of what UK consent rules actually require. That combination is exactly what we bring to Meta Pixel and Conversions API implementation as part of our wider advertising work.
- We handle pixel creation, event mapping, and Conversions API setup together, aiming to ensure deduplication and consent are considered from the start rather than fixed afterwards.
- We advise on consent management platform choices and placement as part of web design and development work, so tracking and compliance are solved in the same project rather than two separate ones.
- We test events before handing reporting over, to help ensure the data you work with is reliable.
Working with a specialist on this tends to be faster than piecing it together internally, mainly because the deduplication and consent questions above are the ones that eat the most unplanned time when they’re worked out from scratch. If you’d like us to take this off your plate, get in touch about your project and we’ll talk through what your setup actually needs.
FAQ
Why install Meta Pixel?
Installing the Meta Pixel lets you measure which website actions, such as purchases or sign-ups, come from your Meta Ads, and build audiences for retargeting based on real visitor behaviour. Without it, Meta has no way to optimise your ad delivery towards people likely to convert, so campaigns tend to perform less efficiently.
Do you have to pay for a meta pixel?
The pixel itself is free to create and use, there’s no Meta fee attached to it. The real costs sit around it: your advertising spend, developer time for installation and Conversions API, a consent management platform, and agency support if you choose to bring one in.
How can I manage my Meta pixel?
You manage your pixel through Meta Events Manager, where you can check its health, review which events are firing, adjust data-sharing settings, and connect or edit your Conversions API setup. Regular checks here, alongside Meta Pixel Helper, catch most issues before they affect your reporting.
Do Facebook pixels still work?
Yes, the pixel still works and remains part of Meta’s advertising measurement, but browser restrictions, ad blockers and consent choices mean it no longer captures every event on its own. That’s why pairing it with Conversions API has become standard practice rather than an optional extra.
Sources
- Set up and install the Meta Pixel | Meta Business Help Center
- Get started with the Meta Pixel – Meta for Developers – Facebook
Recommended
- Update Google Ads conversion tracking before June 2026
- GA4 Not Tracking? UK Agencies Run These Five Checks in Five Minutes
- Website optimisation checklist: your 2026 UK guide
- Facebook A/B testing for marketers: run reliable experiments
Our free marketing audit looks at your site, your ads and your content, and comes back with a 30 day plan. No pitch deck.

Founded AMW Media in 2024 and runs strategy, paid media and the CRM builds. The reason everything here is in house and measured in revenue. Meet the team.